Personalized lock screen

Microsoft Windows 8 Personalized lock screen. from windows.microsoft.com

The tiles of the Start screen

Microsoft Windows 8 The tiles of the Start screen from windows.microsoft.com.

Touch keyboard

Microsoft Windows 8 Touch keyboard from windows.microsoft.com.

Microsoft DreamSpark Offers Free Download Visual Studio 2008, Server 2003, SQL Server 2005

What is DreamSpark.

Microsoft DreamSpark is a world wide program that provides no-cost access to Microsoft designer and development tools for students, In order to support and advance their learning and skills through technical design, technology, maths, science and engineering activities.
Every free Microsoft developer tools download will be verified through an Online Student Status Verification process which linked to schools and organizations around the world that can confirm student status.

What are the Free Offers,


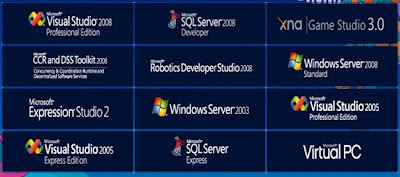
Microsoft developer tools:
o Visual Studio 2005 Professional Edition
o Visual Studio 2008 Professional Edition
o XNA Game Studio 2.0
o 12-month free membership in the XNA Creators Club

Microsoft designer tools:
o Expression Web
o Expression Blend
o Expression Design
o Expression Media

Microsoft platform resources:
o SQL Server 2005 Developer Edition
o Windows Server, Standard Edition

How do I get it?

1. Go to www.dreamspark.com

2. Log in with your Windows Live ID (e.g. your Hotmail or Messenger email address)

3. Select the software you wish to download or get the license key

4. Down the bottom of the page, select the “Verify” button, to verify that you are a student. You will only have to do this once.

5. After you have selected “Verify”, select your country and university, and then select the “Select and Continue” button

6. The you will be showed you for a username and password. Enter the same details that you would use for your UTS webmail, ( i.e. your UTS student number and your UTS webmail password. www.dreamspark.com will connect to UTS (auth-idp.uts.edu.au), UTS will verify your username/password, and send back to www.dreamspark.com whether you are a student or not)

7. Once your student status has been confirmed, go back to the software page, and the download button will now be activated. Also, a section will have appeared at the bottom of the page allowing you to get your license key for the software.

If you have any question Please comment here !

Add a row / Multiple rows to the data table c#.net

I suppose to use a data table as data source in my grid View controller. Can you please explain how I need to do it?

1. The first step is to create an empty Data Table.
DataTable dt = new DataTable();

2. Second step is to create a new DataRow object.
DataRow newRow = dt.NewRow();

3. Now you have created and initialized a DataRow. So then it is needed to add values to rows.
newRow["id"] = 1; // we have created column call “id” and add it to value 1
newRow["username"] = "adam" ; // we have created column call “username” and add it to value “adam”.

4. Next, we want to add this newly created row (with two columns) to the blank Datatable we created in the first step.

dt.Rows.Add(newRow);

5. You can now set this created Datatable as a DataSource and then DataBind to the GridView or any other similar C# control.

gridView1.Datasource = dt;
gridView1.Databind();

All the steps from above are put together in the below:

DataTable dt = new DataTable();
DataRow newRow = dt.NewRow();
newRow["id"] = 1;
newRow["username"] = "adam" ;
dt.Rows.Add(newRow);
gridView1.Datasource = dt;
gridView1.Databind();


Let see how to add multiple records in datatable without write multiple time code

DataTable dt = new DataTable();
dt.Columns.Add("Min", System.Type.GetType("System.Int32"));
dt.Columns.Add("Max", System.Type.GetType("System.Int32"));
dt.Columns.Add("Avg", System.Type.GetType("System.Int32"));

for (int i = 0; i < i =" i">
{
DataRow dr = dt.NewRow();
row["Min"] = i;
row["Max"] = i + 9;
row["Avg"] = (i + 9) / 2;
dt.Rows.Add(dr);
}

You can add values to row using for loop.


SQL Server 2005 — Enhancements

What are the enhancements for Data Base Administrators in SQL Server 2005 ?

SQL Server 2005 has provide single management console that enables data base Administrators monitor, manage and tune all databases and services. SQL Management Object (SMO) is an efficient management infrastructure to easily program. SMO provides all the management functionalities of the SQL Server and is implemented as a Microsoft .NET Framework assembly.
The primary purpose of the SMO is to automate administrative tasks such as retrieving configuration settings, creating new databases, applying T-SQL scripts, Creating SQL Server Agent jobs and so on

1. SQL Server Management Studio :
It is a one point access to a number of services – the relational database, the Integration services, Analysis services, Reporting services, Notification Services and SQL Mobile.
Indexing capabilities
The SQL Server 2005 has been greatly enhanced. Indexes can be created, rebuilt or dropped online without disturbing existing indexes. This online indexing capability allows parallel processing, concurrent modifications to the table in the database or clustered index data or any other associated indexes.

2. Peer to peer model of replication
It is enables synchronization of transactions with an identical peer database. This further improves availability of data.

3. Table and index partitioning
It is concept of large databases by dividing the whole into manageable chunks. The concept is not new to the SQL Server, but the partitioning of tables horizontally across file groups in the database is new.

4. Snapshot isolation
This feature allows users access the last row that was committed by providing a transactional and consistent view of the database.

5. Replication monitor tool
It defines a new standard for managing complex data replication operations. Its interface is intuitive and has a number of data metrics that are useful.

6. New security model
Security model of the database platform now provides more precise and flexible control for ensuring security of store data.

7. Encryption capabilities
Data encryption of the database has been integrated with the management infrastructure for centralization of security assurance and server policy.

8. Secure computing measures
Those things have been put in place to enable deployment of a secure environment.
SQL Server Express Manager (XM)
This is a free Query Editor tool that is available for download.

9. Improved Business Intelligence

10. Improved Analysis Services

11. Improved Reporting services

How to use savefiledialog box in the c#.net ?

// Create a new SaveFileDialog object
SaveFileDialog obDialogSave = new SaveFileDialog();

// Set Default file extension to dialog
obDialogSave.DefaultExt = "txt";

// Other Available file extensions to dialog
obDialogSave.Filter = "Text file (*.txt)|*.txt|XML file (*.xml)|*.xml|All files (*.*)|*.*";

// Adds a extension if the user does not select
obDialogSave.AddExtension = true;

// Restores the selected directory, next time
obDialogSave.RestoreDirectory = true;

// To display Dialog title
obDialogSave.Title = "Where do you want to save the file?";

// Start directory
obDialogSave.InitialDirectory = @"C:/";

// Show the dialog and process the result
if (obDialogSave.ShowDialog() == DialogResult.OK)
{
// your code go here if user click on “OK” button.
MessageBox.Show("You selected the file: " + DialogSave.FileName);
}
else {
// your code go here if user click on “Cancel” button.
MessageBox.Show("You click cancel.");
}

obDialogSave.Dispose();

// Set object to null.
obDialogSave = null;

What is .Resx file in Dot Net?

What is .Resx file in Dot Net? How to access?

Resource files are used in .NET to store culture-specific data all in one place, separate from the code. For example, suppose you are developing a multi-language Web site and you have a form on a page with a label beside a text field and the label in English says "First Name." Instead of having code like this:

if (language == "English")
{
lblFirstName = "First Name";
}
else if (language == "German")
{
lblFirstName = "Vorname";
}
You can just do this:

ResourceManager resourceManager = new ResourceManager("nameSpace.resourceFileBaseName",
Assembly.GetExecutingAssembly());
lblFirstName = resourceManager.GetString("lblFirstName");
And that's it—just two lines. There's no need to change a million sections of code each time you add or take away a language.


Reading from .Resx File:

You can access the .Resx file using this code:

ResXResourceReader reader = new ResXResourceReader(Server.MapPath("fileName.resx"));
IDictionaryEnumerator rsxr = reader.GetEnumerator();
foreach (DictionaryEntry d in reader)
{
Console.WriteLine(d.Key.ToString() + ":\t" + d.Value.ToString());
}
//Close the reader.
reader.Close();

Writing to .Resx File:

We can write the binary data of an image to the .Resx file using the following code

Image img = Image.FromFile("abc.jpg");
ResXResourceWriter rsxw = new ResXResourceWriter("abc.resx");
rsxw.AddResource("urdu.jpg",img);
rsxw.Close();

Use of .Resx File:

It is very useful while working on Localized project [Multiple Languages], You can make different resource files for different languages and depending upon the user choice you can change the Language of the application.